1. Construct the plotter#
This tutorial takes you through the process of building a plotter with 8cm arms. 8cm arms are suitable for drawing an area approximately 14cm wide by 9cm high. This fits well onto a sheet of A5 paper.
1.1. Components and materials#
You’ll need:
a Raspberry Pi
three servo motors (recommended model: TowerPro SG90 - see servo motors for more information)
sticks or stiff card to make two arms, each about 10cm long
jumper wires and GPIO pin header to connect the Pi to the servos
a clothes peg
a board or sheet of card, about A4 size
strong adhesive or a hot glue gun
1.2. Assembly#
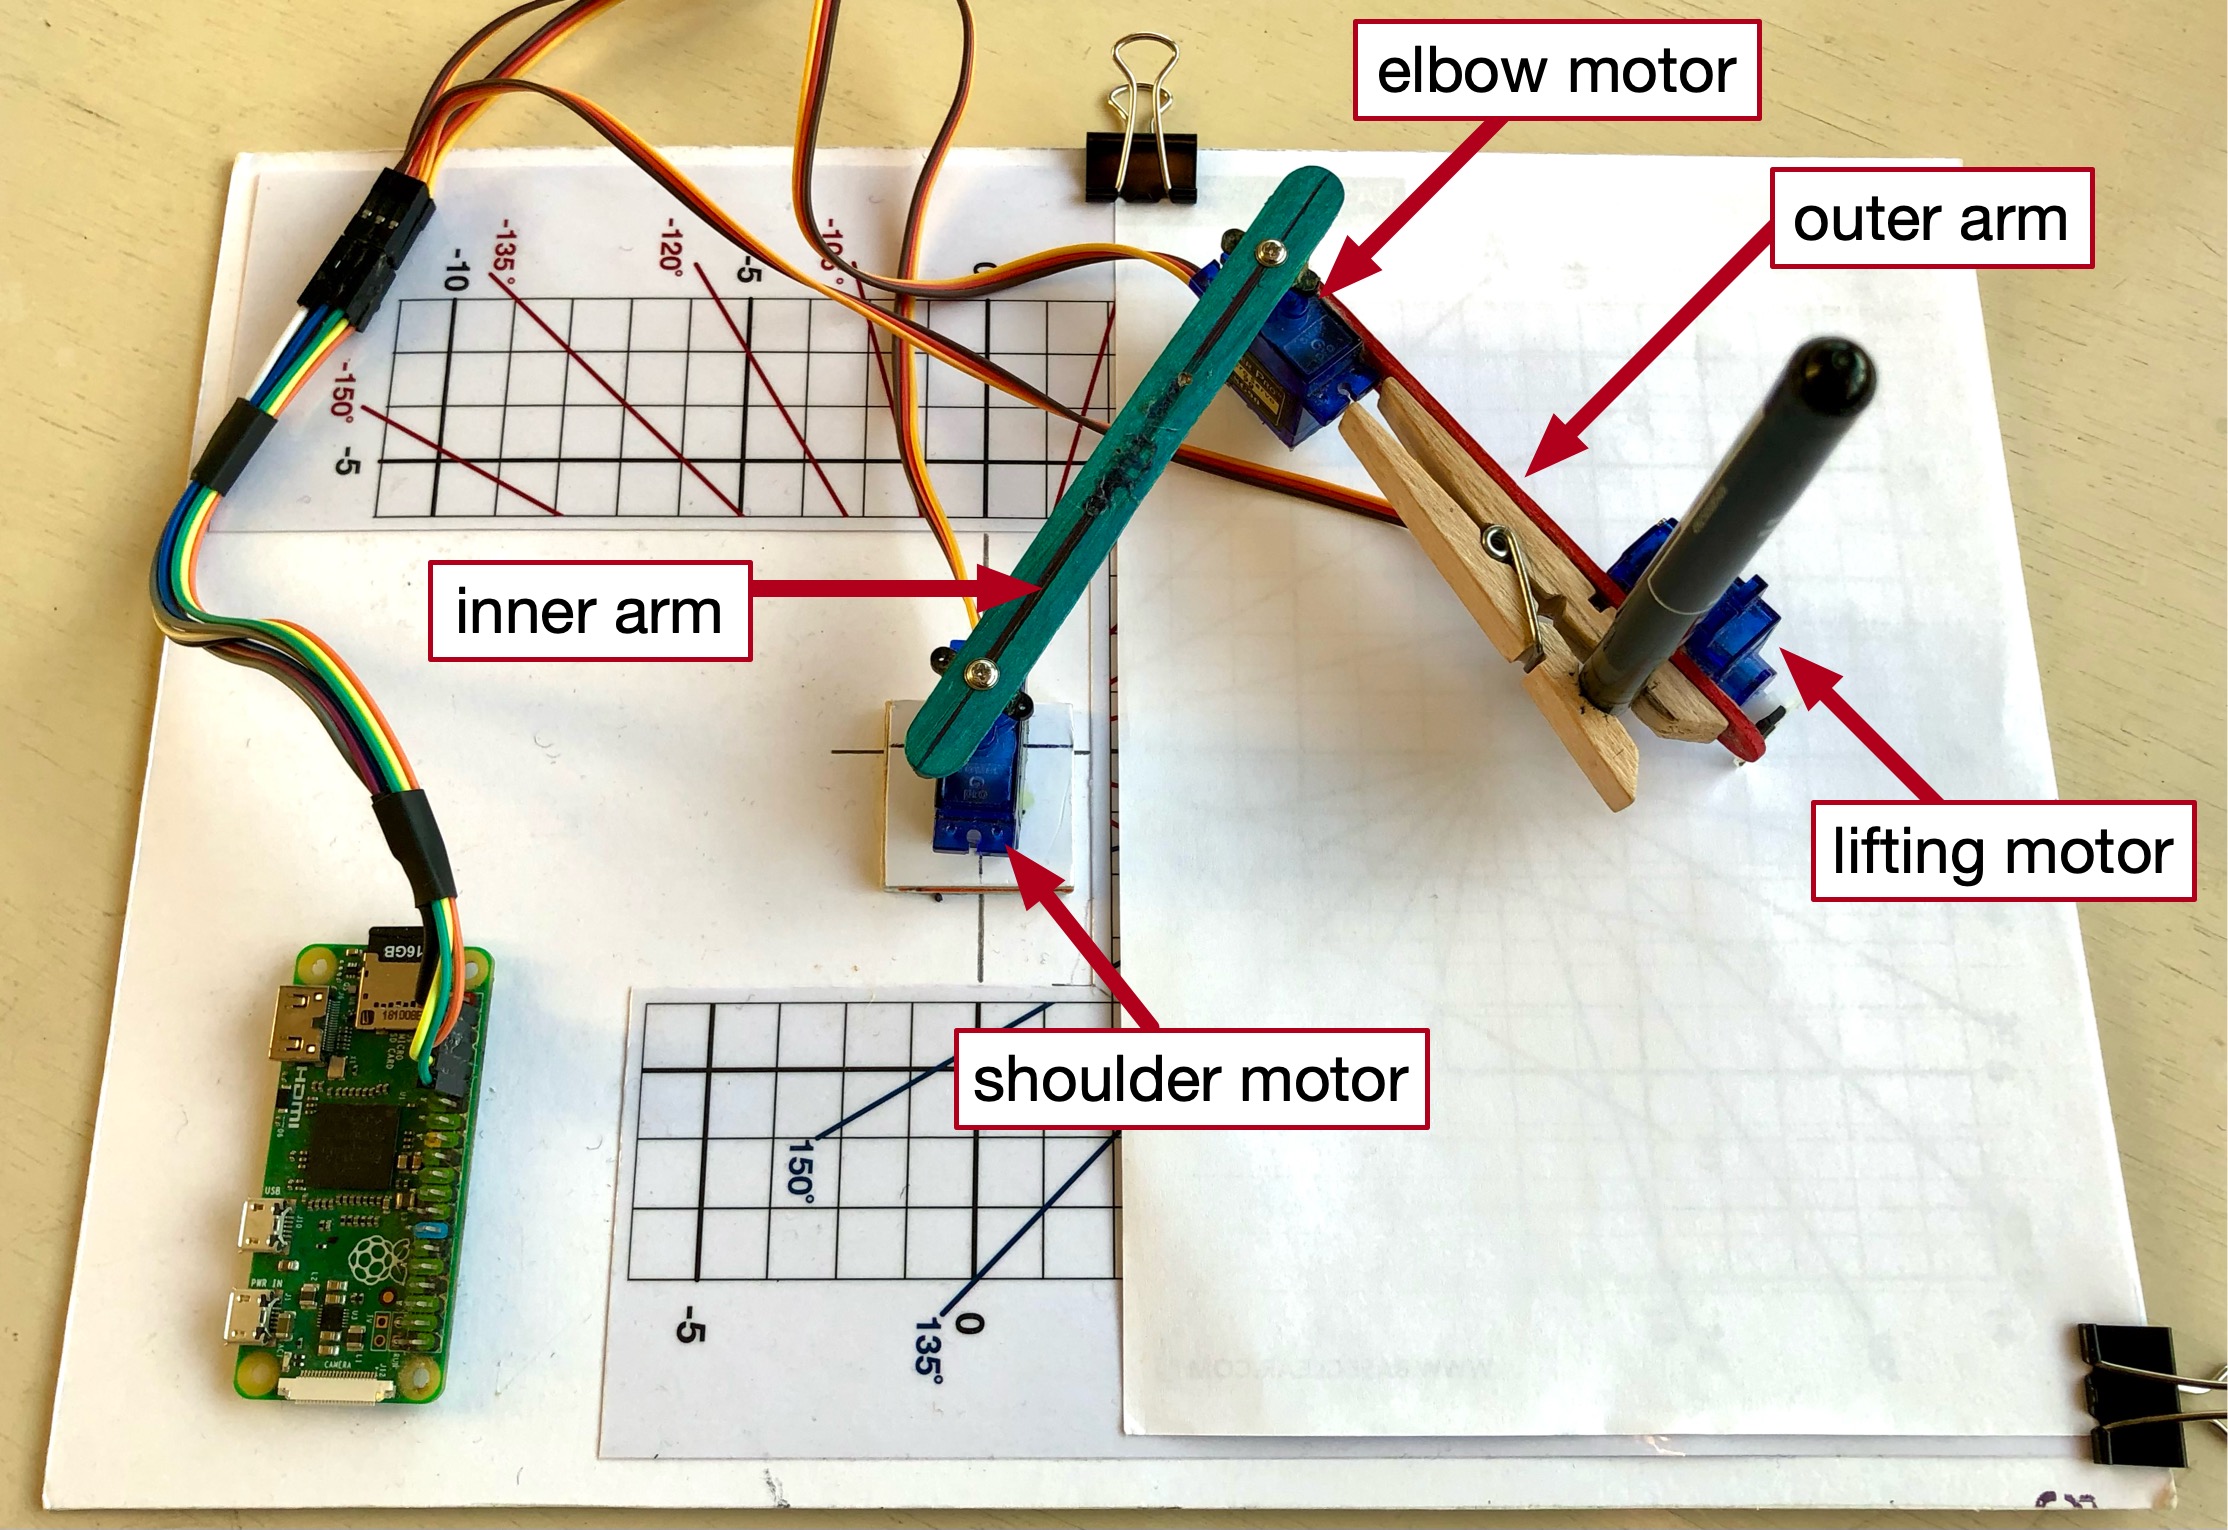
The image below shows the basic construction of the BrachioGraph plotter and the names of some key parts. In this example, the drawing sheet is A5 size.
1.2.1. The shoulder motor#
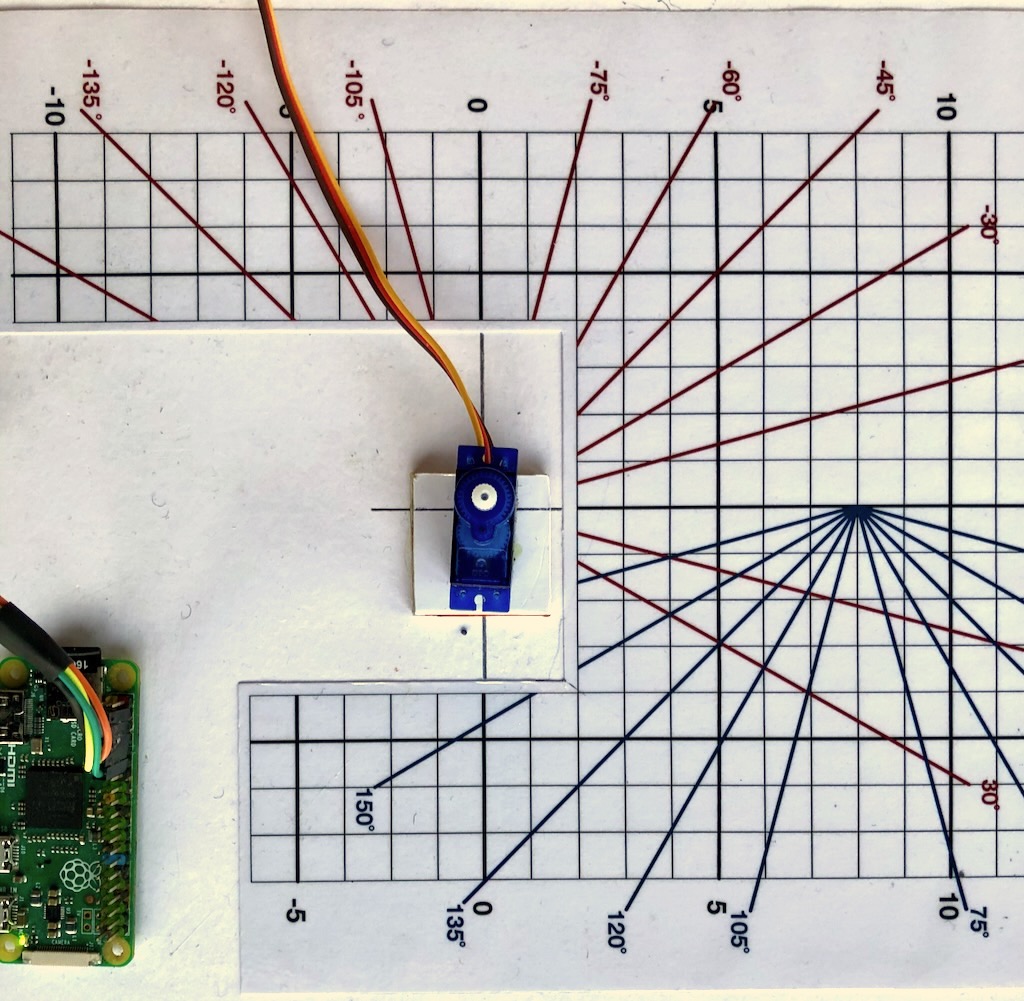
The shoulder motor needs to be affixed in the right position. You can work out a suitable position using the image
above as a guide, but even better, print out the supplied template grid. Affix that to the board. The motor’s spindle will need to be placed at location
0, 0 according to the grid, as shown below:
The servo motor needs to be raised by a few millimetres (4-6mm should be OK), for example with some layers of card. Glue it into place.
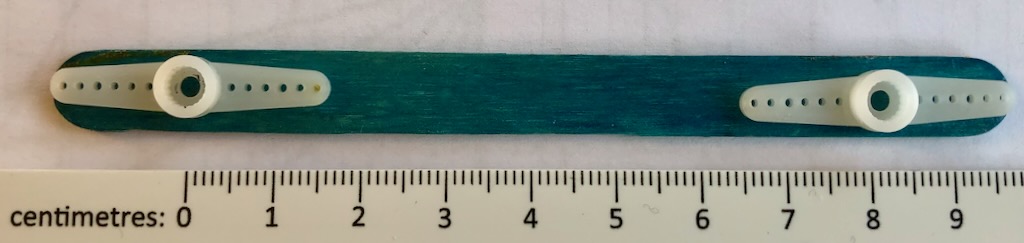
1.2.2. The inner arm#
Glue the servo horns - the little plastic arms that attach to the motor spindles - to the inner arm, so that the centres of rotation are exactly 8cm apart.
1.2.3. The outer arm, clothes-peg and servos#
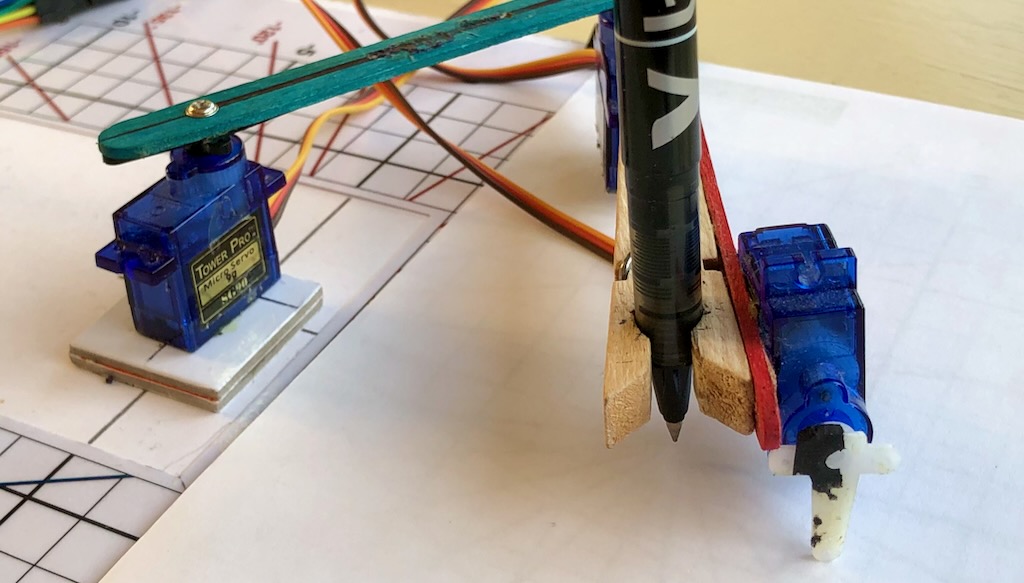
Glue a servo and a clothes-peg to the outer arm, so that a pen in the clothes-peg and the centre of rotation of the arm will also be exactly 8cm apart.
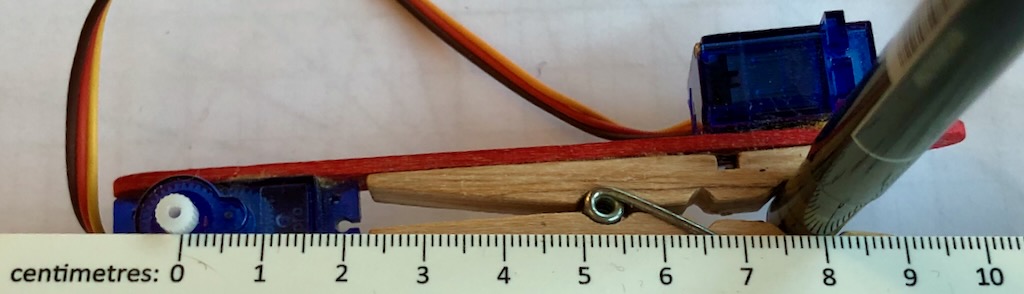
Glue the final servo in such a position that its horn can rotate safely, and will be able to lift the pen clear of the paper - see the close-up above.